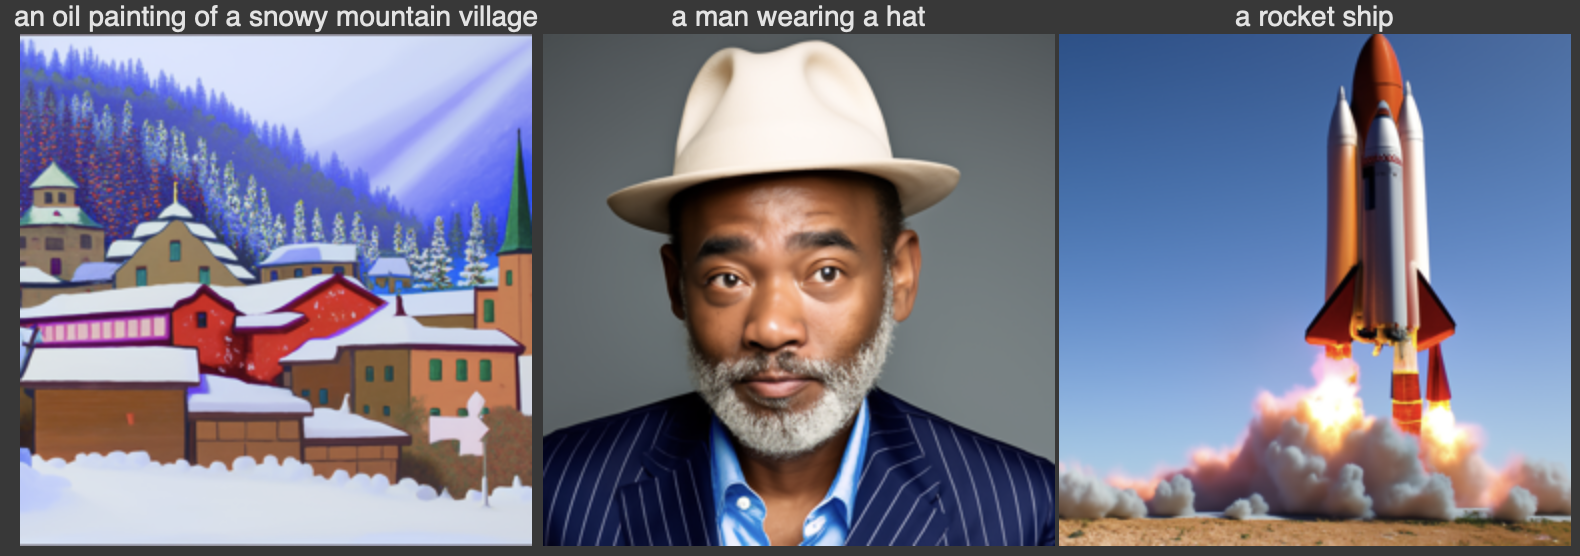
Output images after 20 iterations
This section introduces the DeepFloyd IF diffusion models used for generating images. The models include a stage 1 U-Net for 64x64 images and a stage 2 U-Net for upscaling to 256x256. Below are results of generated images using different iterations.

Output images after 20 iterations
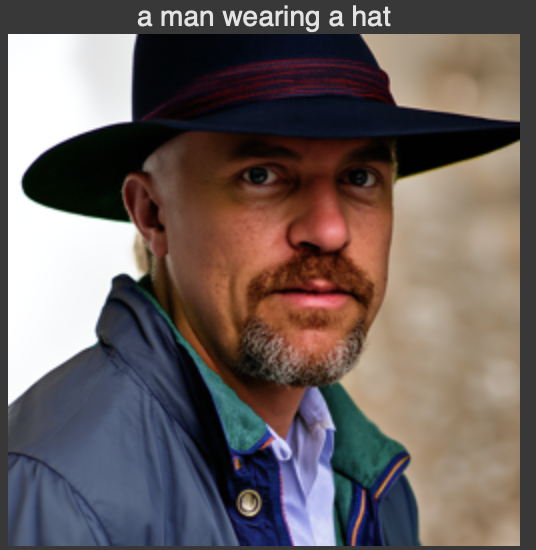
Man Wearing Hat 40 Iterations
In this section, I progressively added noise to a test image at different timesteps. I did this by implementing a forward pass with the formula x_t = sqrt(a_bar_t) * 𝑥0 + sqrt(1−a_bar_t) * e, where e ~ N(0,1) The results below illustrate the effect of increasing noise levels.

Noised Image (t=250)

Noised Image (t=500)

Noised Image (t=750)
In this section, I attempt to denoise the images using Gaussian blurring on various noise levels. The results below show the limitations of this approach to denoising.
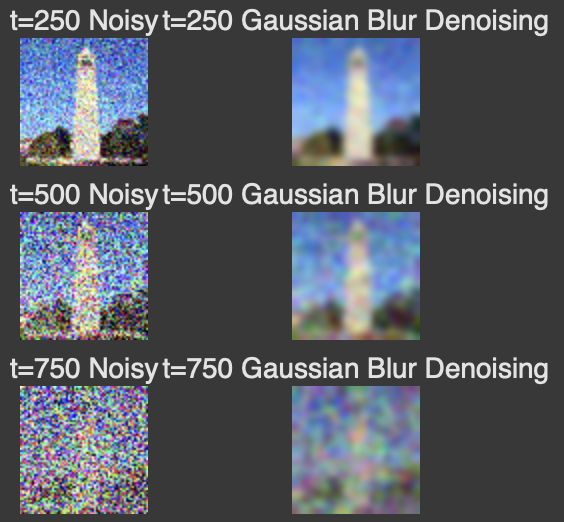
Gaussian Blurring at various noise levels.
In this section, a pre-trained U-Net was used for one-step denoising. I estimate the noise in the noisy image by passing it through stage_1.unet and then remove the noise from the noisy image to obtain an estimate of the original image. Here are the results for different levels of noise.
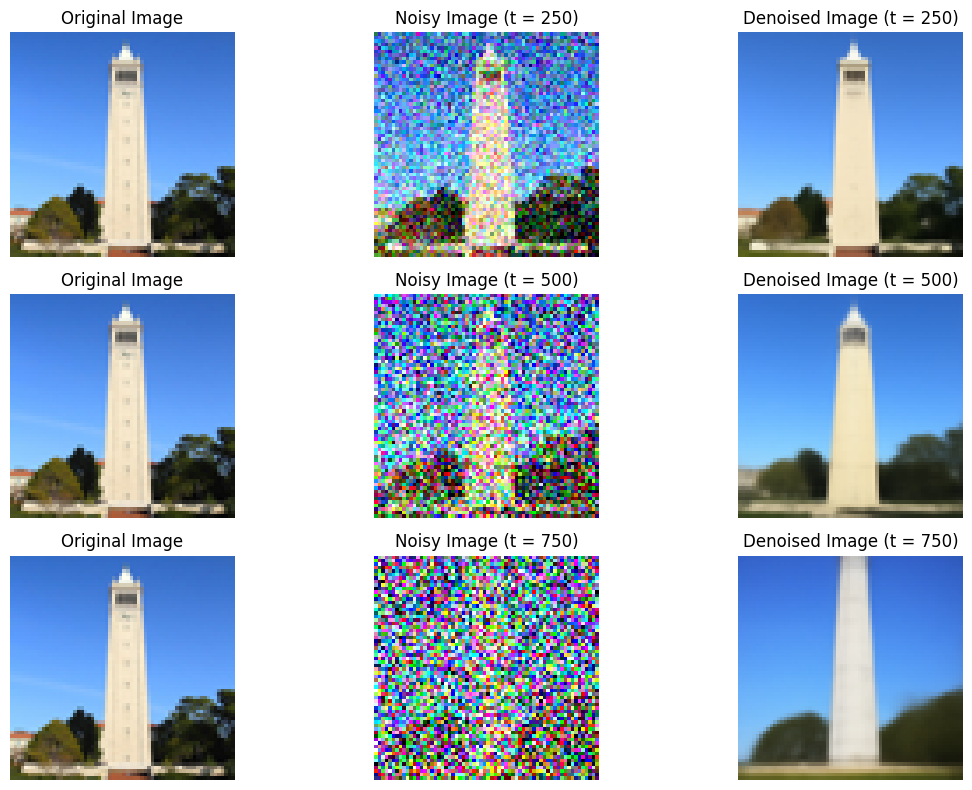
One-Step Denoising at various noise levels
In this section, I implemented iterative denoising in which I use stridded timesteps to iterative denoise the image gradually. This has improved results over one-step denoising by gradually reducing noise over time.

Iterative Denoising compared to other methods

Iterative Denoising outputs at various timesteps
In this section, images were generated from pure random noise using iterative denoising by starting with a completely noisy image and then gradually removing the noise to generate a sampled image. Here are the sampled results.

Sample images from Diffusion Model
In this section, I implement Classifier Free Guidance, where images are generated using a combination of conditional and unconditional sampling. To get an unconditional noise estimate, I pass an empty prompt embedding to the diffusion model and pass in 'a high quality photo' for the prompt embedding. By setting the guidance weight (gamma) to 7, I can generate higher quality images.

Sample images using classifer free guidance with gamma=7
In this section, I implemented Image-to-image translation. To do so I take an original image, add noise to it, and then force it back onto the image manifold without any conditioning. This generates an image that is similar to the test image.

Image-to-Image Translation of Campanile test image.
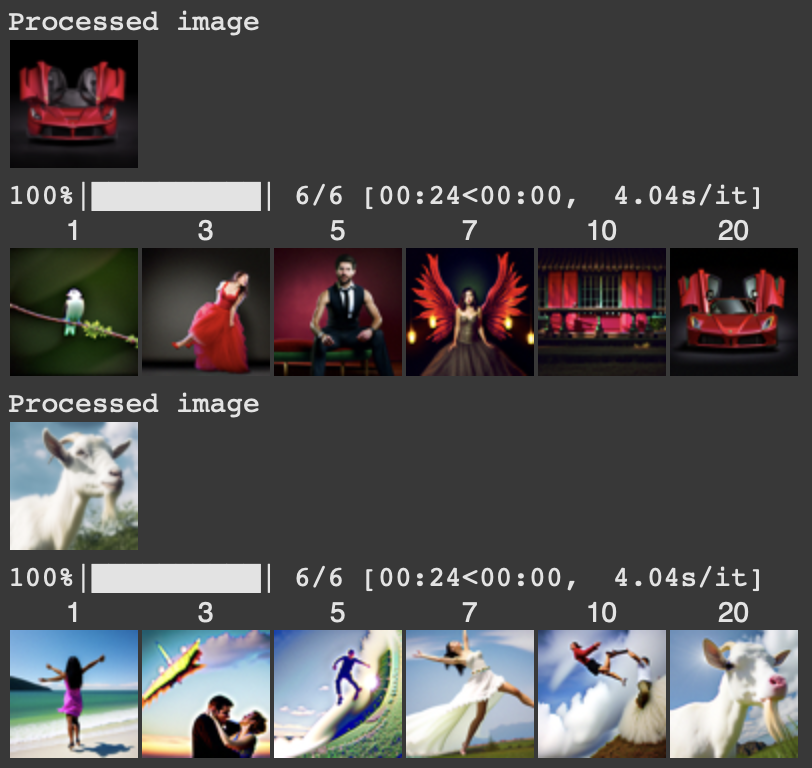
Image-to-Image Translation of LaFerrari and a goat.
This section explores editing hand-drawn and web-sourced images. The process involves feeding these nonrealistic images into the model to attempt to bring them into the natural image manifold.
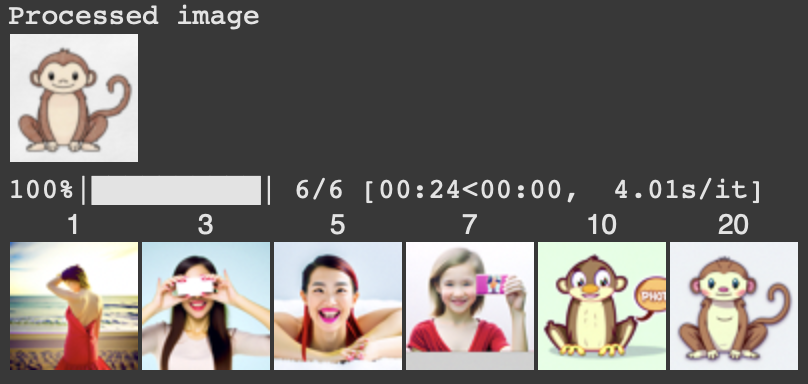
Image of cartoon monkey from the web.
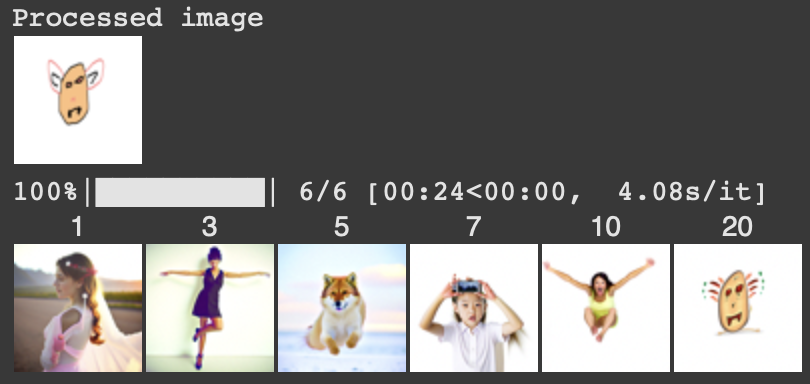
Hand drawn image of a character.
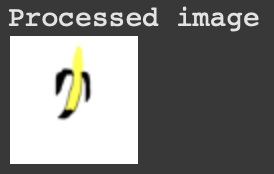
Hand drawn image of a banana.

Image of a banana through the model.
In this section, I implement Inpainting in which a mask a part of an image and then fill in the area within the mask using diffusion models. Below are results of inpainting applied to iconic landmarks like the Campanile, Eiffel Tower, and Leaning Tower of Pisa.

Campanile Inpainting results.

Eiffel Tower Inpainting results.

Leaning Tower of Pisa Inpainting results.
In this section, I implemented Text-conditioned image-to-image translation which combines the original image with a text prompt to guide the diffusion process in order to incorporate control through language. The results below demonstrate transformations applied to landmarks based on specific text descriptions.

Campanile with a rocket ship prompt.
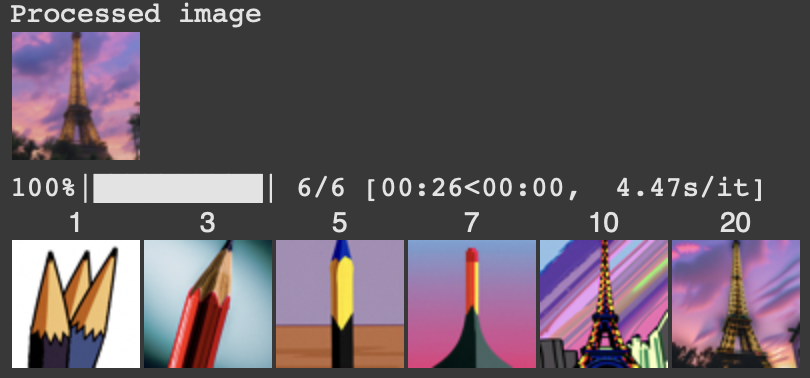
Eiffel Tower with a pencil prompt.
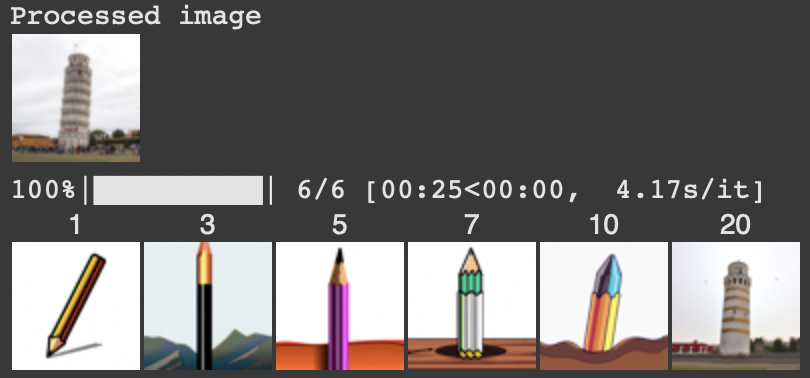
Leaning Tower of Pisa with a pencil prompt.
In this section, I created Visual anagrams through the use of diffusion models to mix and overlay features from two distinct prompts. To achieve this I denoise an image at a given timestep normally with a prompt to obtain a noise estimate. Then at the same time, I flip the image upside down and denoise with a different prompt to get a second noise estimate. I flip this noise estimate back and average the two noise estimates before performing a reverse diffusion step to create the anagram.
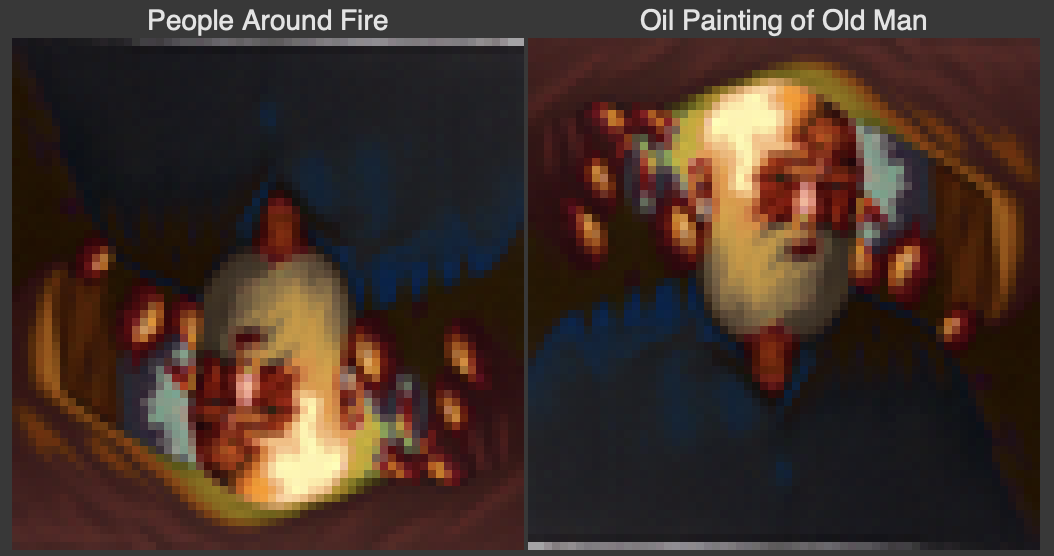
People Around Fire and Oil Painting of Old Man.

People Around Fire and Oil Painting of Old Man.
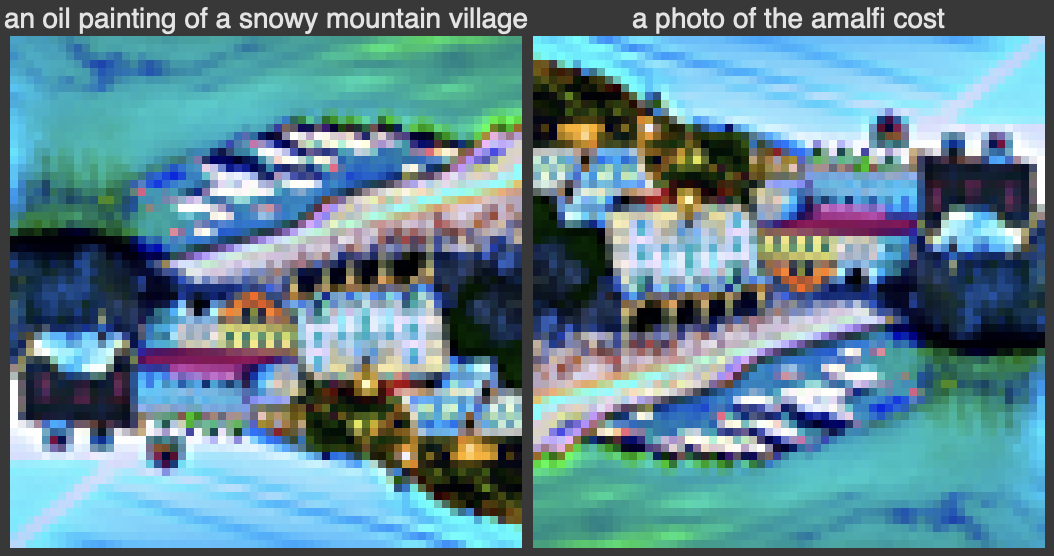
An oil painting of a snowy mountain village and a photo of the amalfi cost

An oil painting of a snowy mountain village and a photo of the amalfi cost
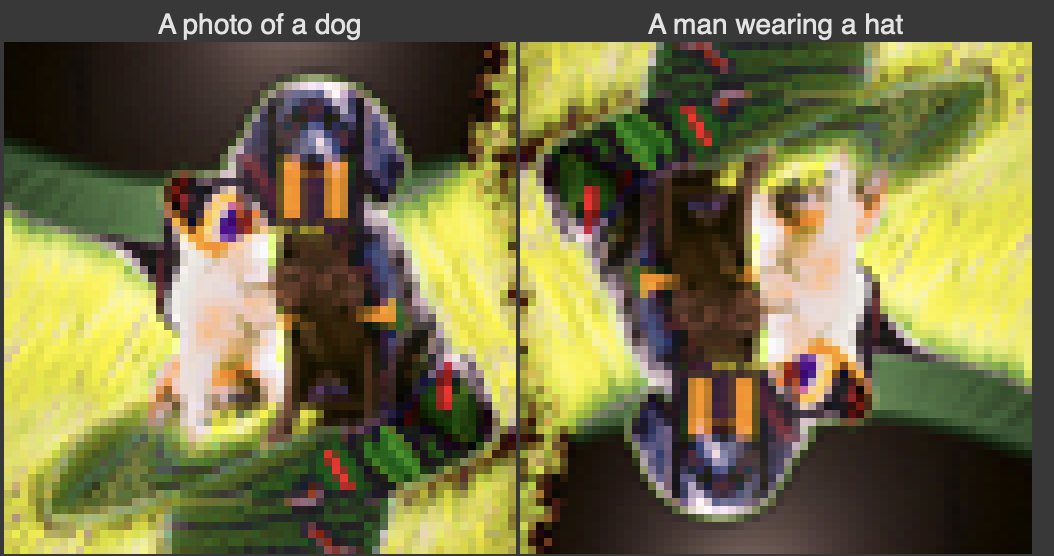
A photo of a dog and A man wearing a hat
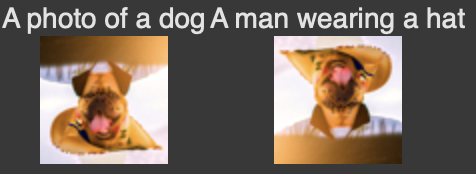
A photo of a dog and A man wearing a hat
I created hybrid images by estimating the noise with two different text prompts, and then combining low frequencies from one noise estimate with high frequencies of the other noise estimate. This generates a hybird image that looks different based on the distance it is viewed from.
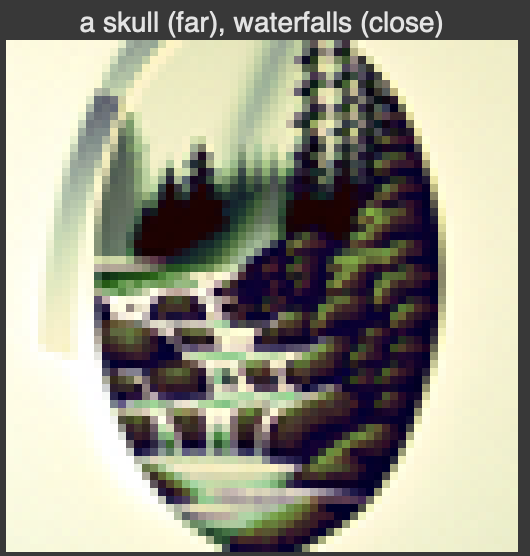
An image of a skull (far), waterfalls (close).

An image of a skull (far), waterfalls (close).
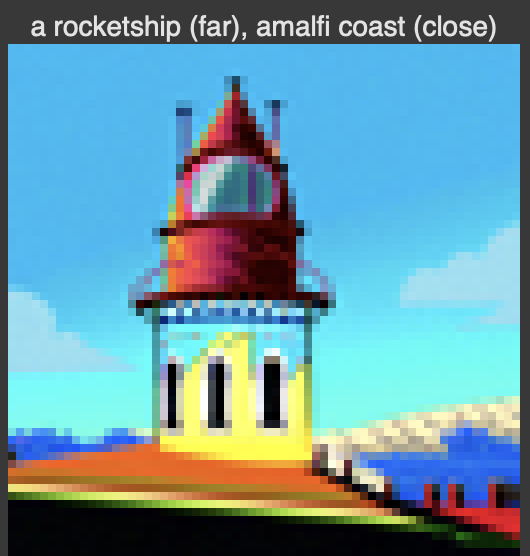
An image of a rocketship (far), amalfi coast (close)

An image of a rocketship (far), amalfi coast (close)
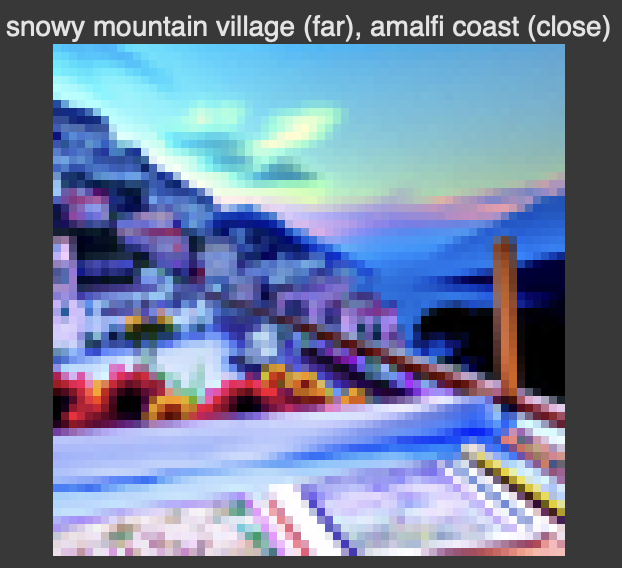
An image of snowy mountain village (far), amalfi coast (close)

An image of snowy mountain village (far), amalfi coast (close)
In this section, I implemented and trained a diffusion model using the MNIST dataset. This involved building and training a UNet for iterative denoising, exploring time-conditioning, and class-conditioning.
In this part, I train a U-Net to denoise noisy MNIST images. To accomplish this, I add noise to the digits. Then, I train the U-Net on noisy and original image pairs in order for the net to learn how to denoise the iamges. For training, I set the noisy level to sigma=0.5. After training, I tested the performance on out of distribution images, meaning images with noise level other than sigma=0.5.

Example of noisy images from MNIST
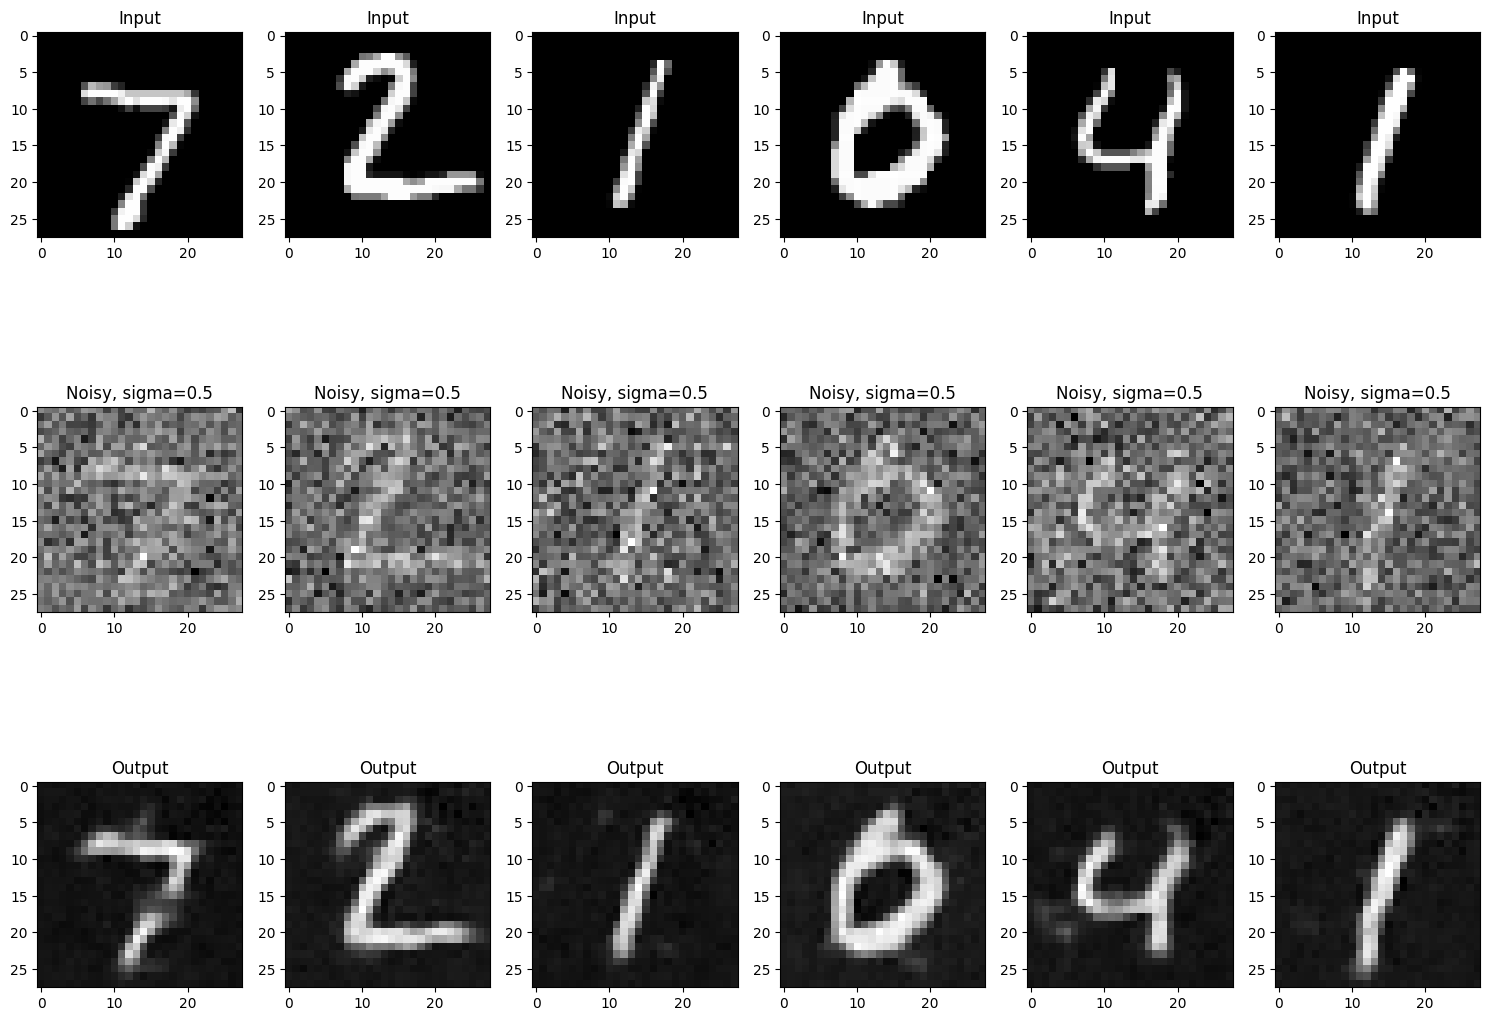
Unconditional U-Net after 1 Epoch
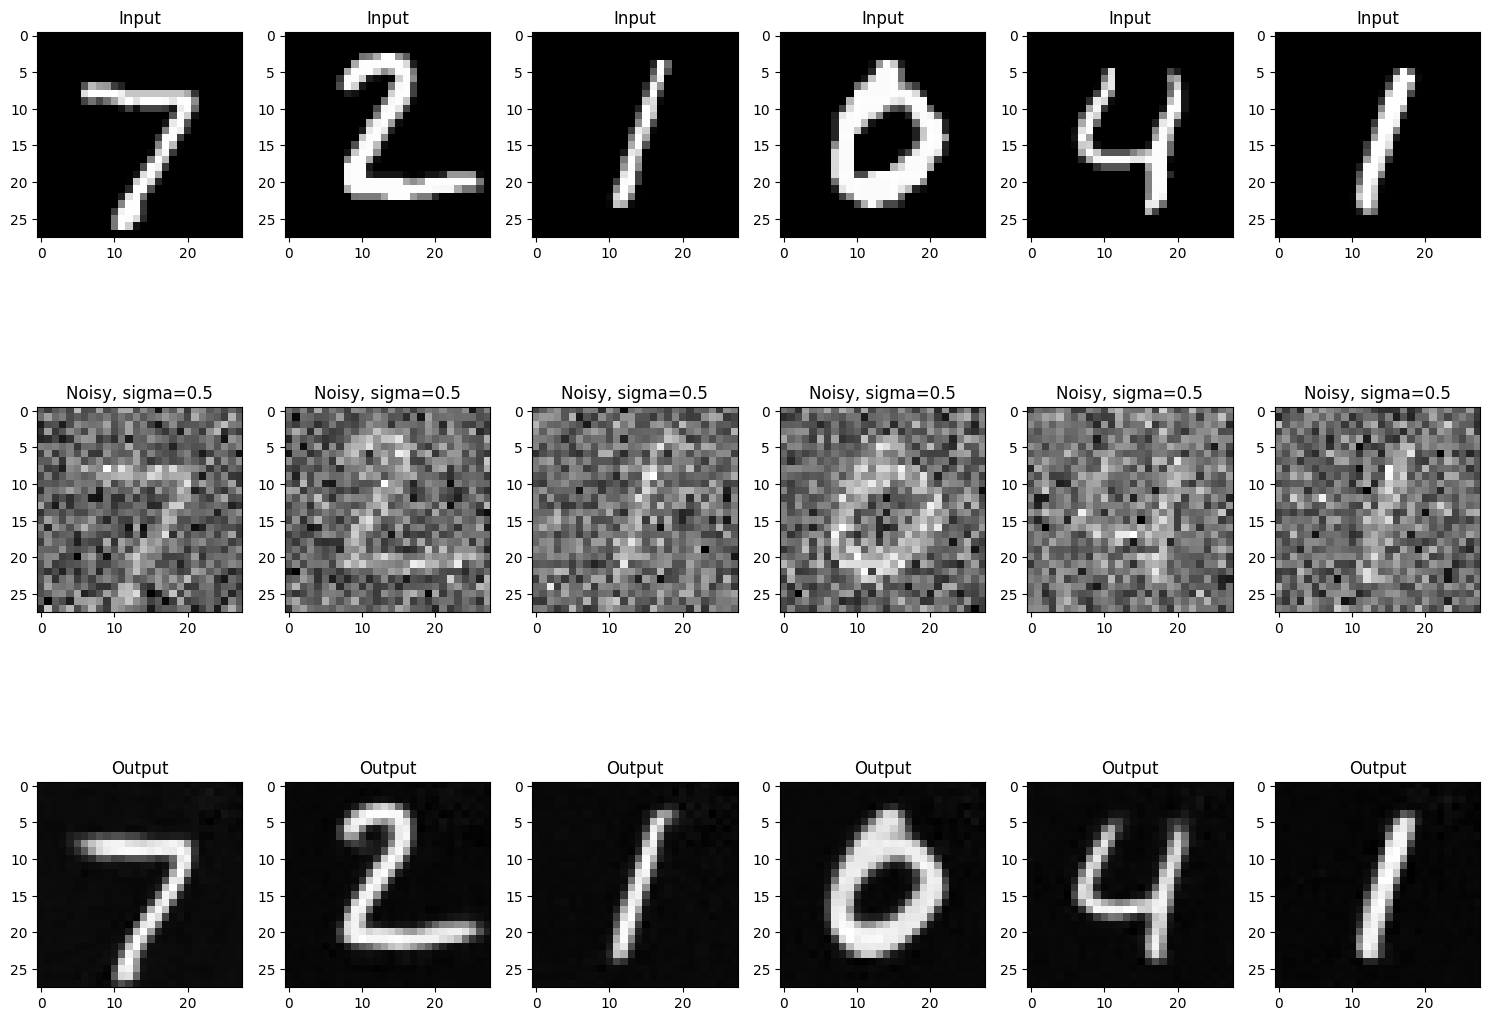
Unconditional U-Net after 5 Epochs
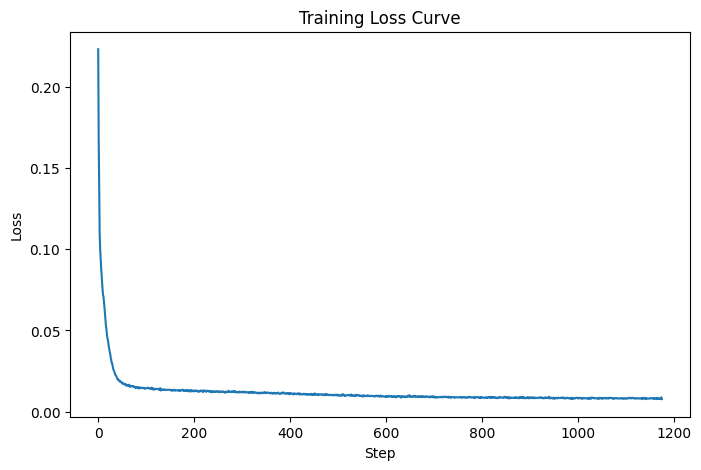
Unconditional U-Net Loss Curve
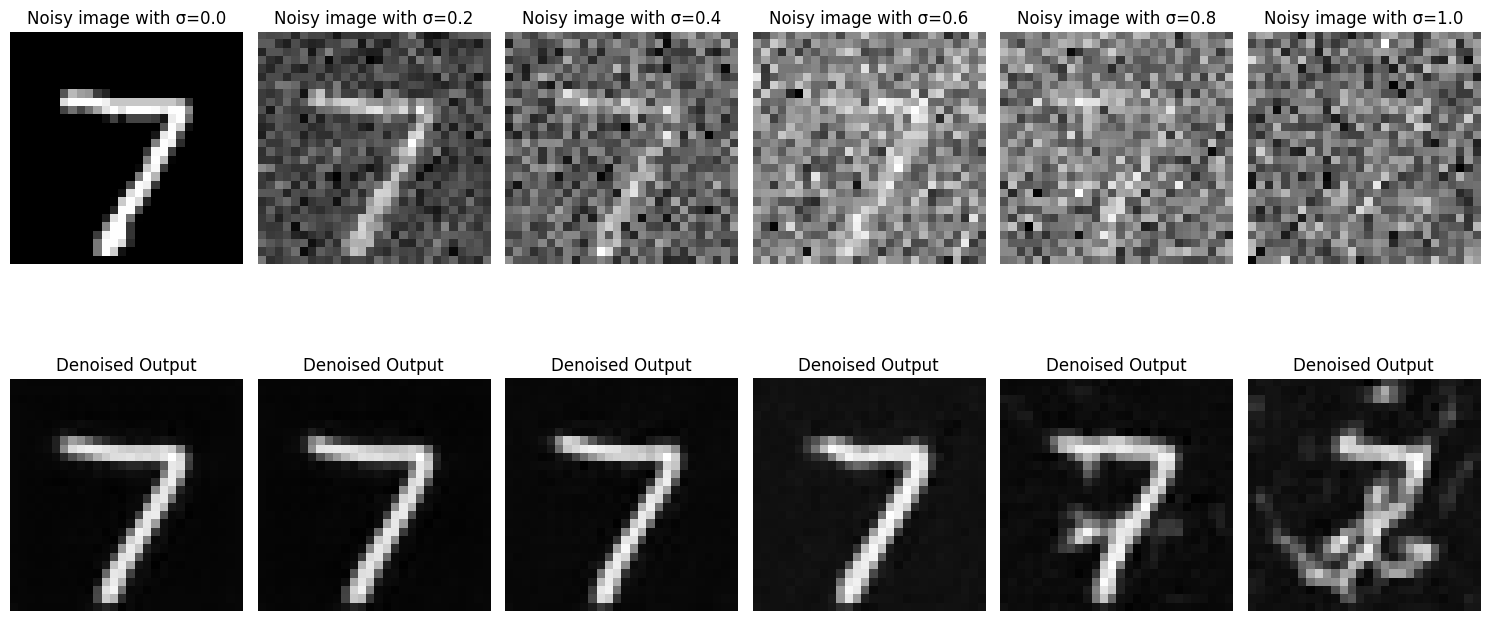
Unconditional U-Net Out of Distribution Testing
In this part, I make the U-Net predict the noise of an image instead of performing the denoising itself. This is done since iterative denoising works better than one-step denoising. To do this I add conditioning on the timestep of the diffusion process to the U-Net. Now the training workflow involves noising each image with a random timestep value from 0 to 299, passing it through the U-Net to get the predicted noise, and then calculating the loss between the predicted noise and actual noise added. To sample from the model, I utilize the iterative denoising algorithm where I start from an image of pure noise, and then iteratively move towards the clean image. The pseudocode for the training and sampling algorithms along with training results is shown below.
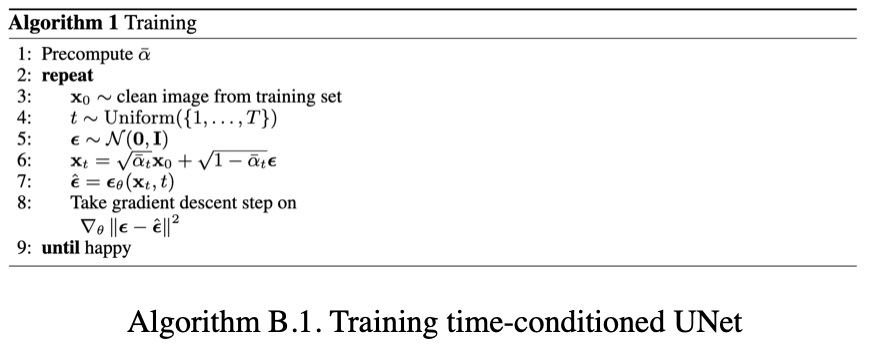
Training algorithm for time conditioned UNet
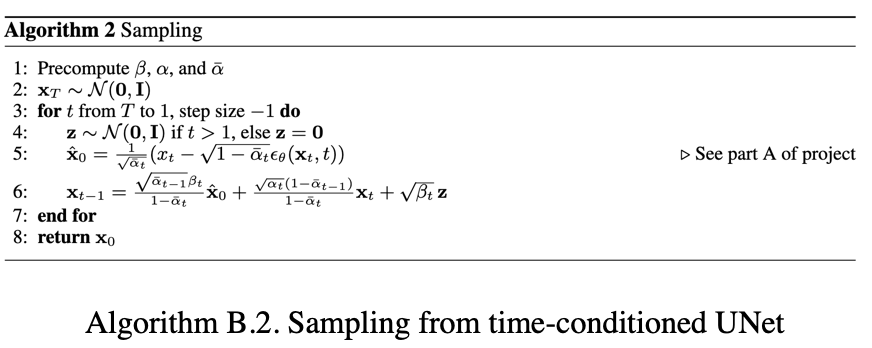
Sampling algorithm for time conditioned UNet

Time-Conditional U-Net after 5 Epochs

Time-Conditional U-Net after 20 Epochs
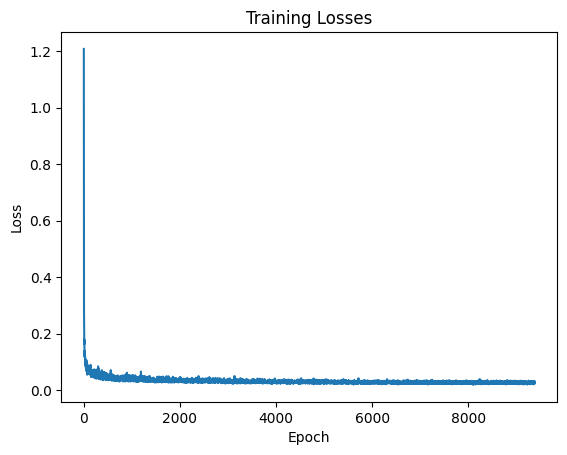
Time-Conditional U-Net Loss Curve
In this section, I add class-conditioning to the U-Net in order to improve the quality of the generated images. I now utilize the MNIST training data labels as a one-hot encoded vector and feed it as input into the U-Net as well to achieve class-conditioning. To sample, I pass in the one-hot encoded vector corresponding to the digit I want to generate. Psuedocode for the training and sampling algorithms for the class conditioned model is shown people along with training results.
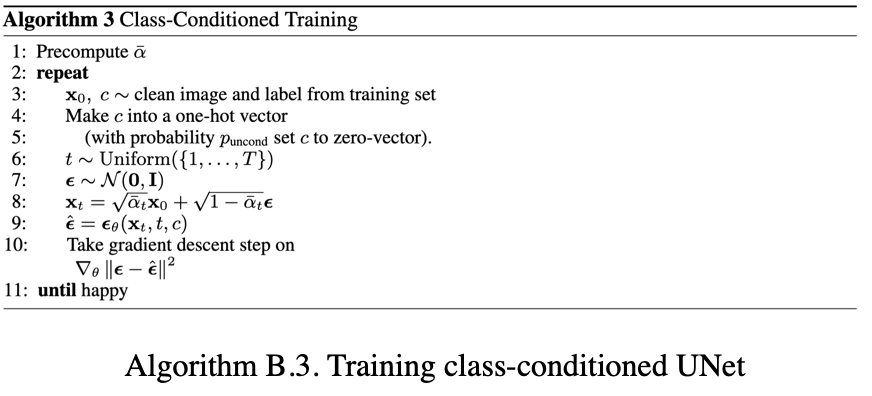
Training algorithm for class conditioned UNet
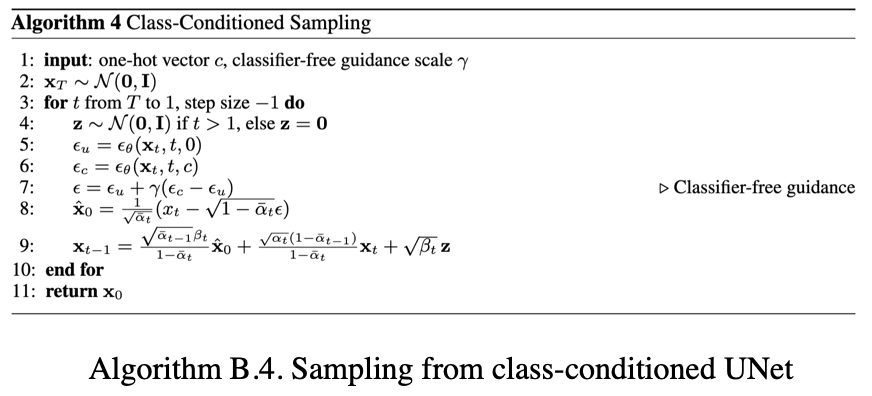
Sampling algorithm for class conditioned UNet
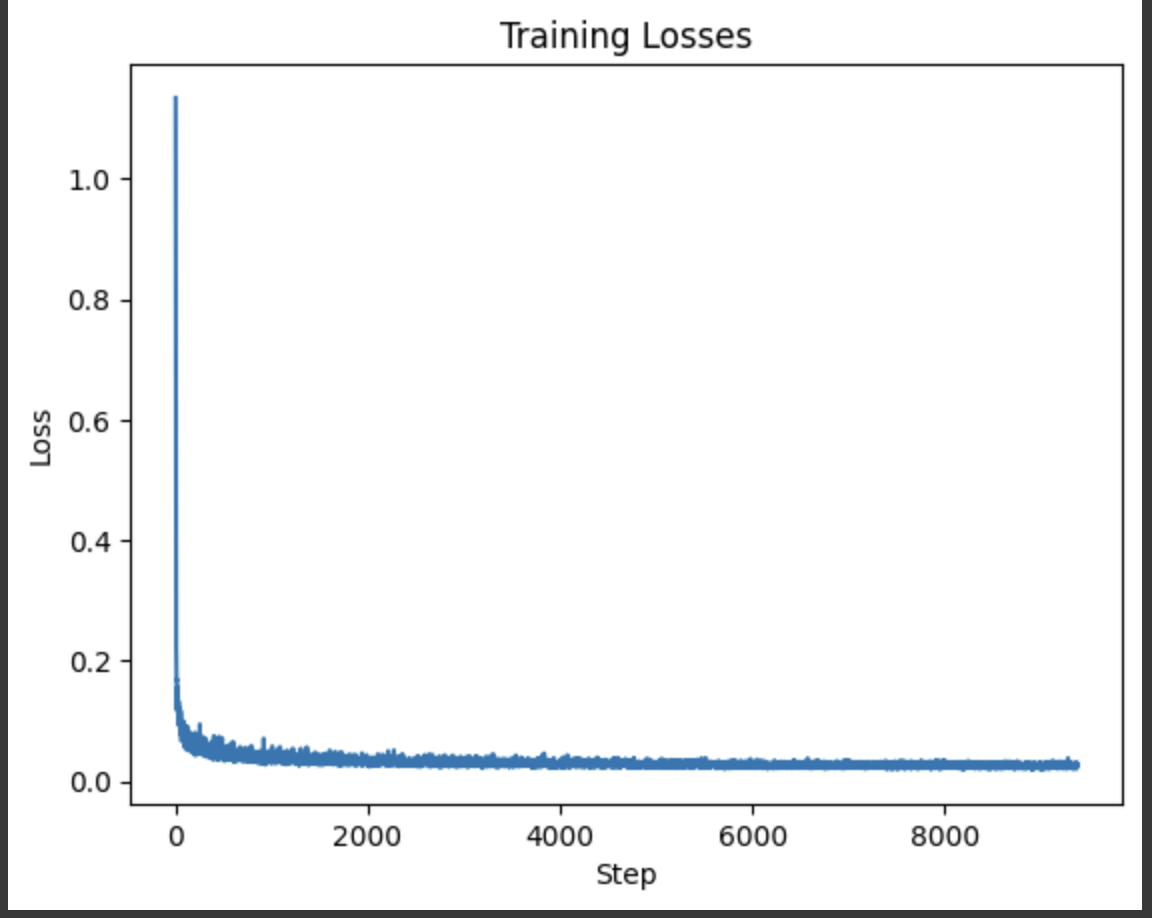
Class-Conditional U-Net Loss Curve
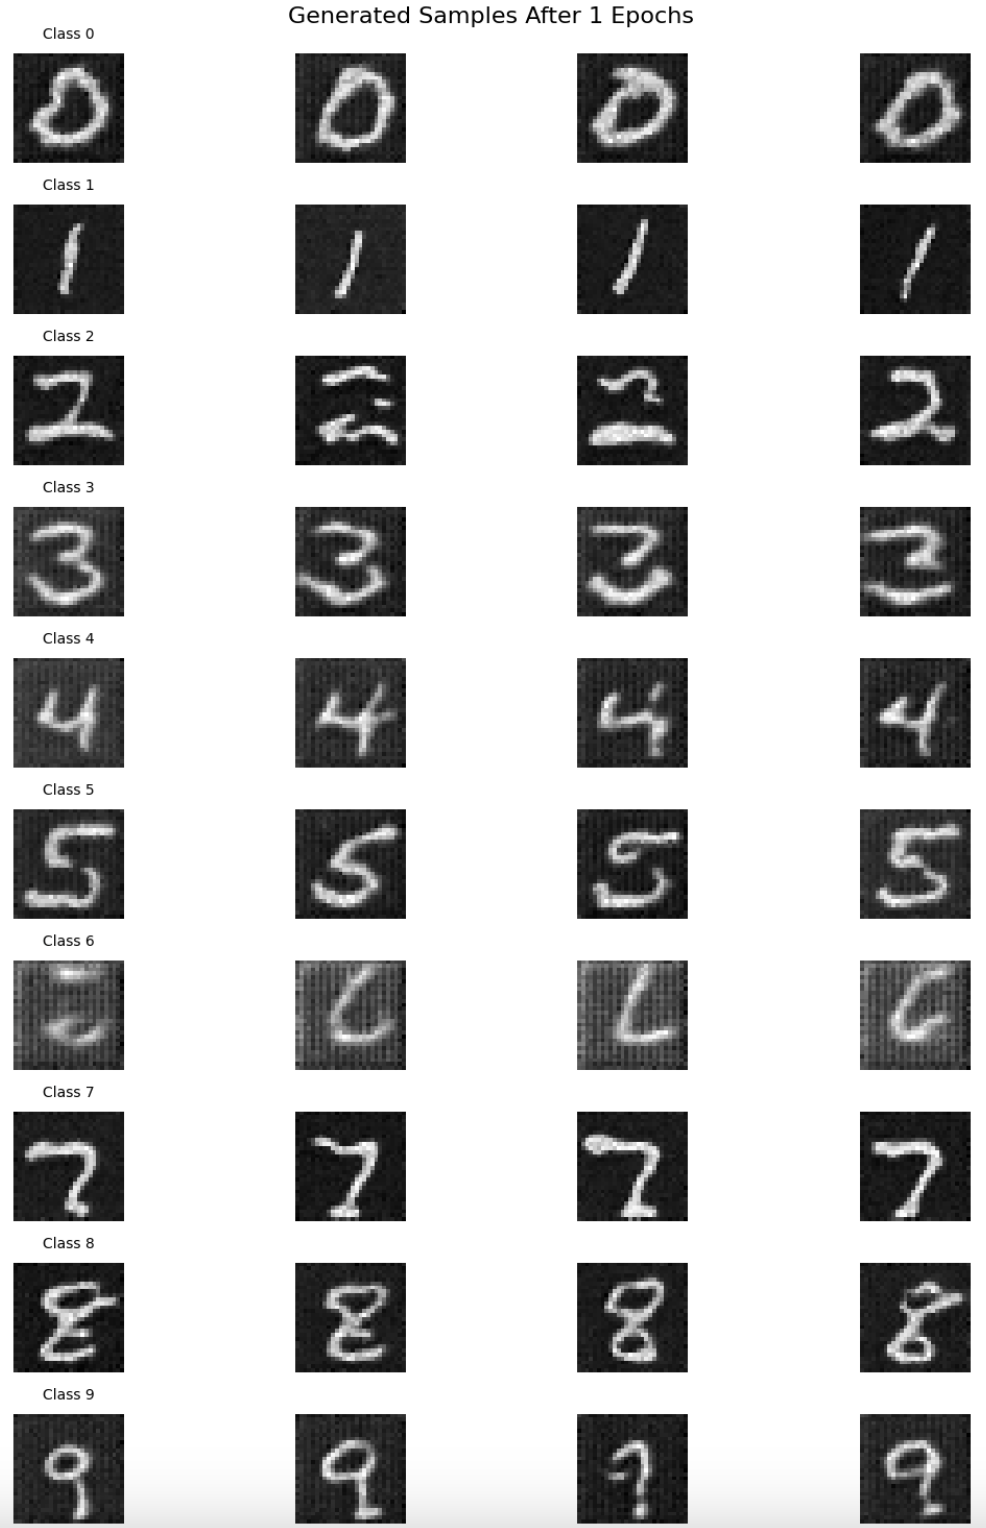
Sampling results for the time-conditioned UNet for 5 epochs.
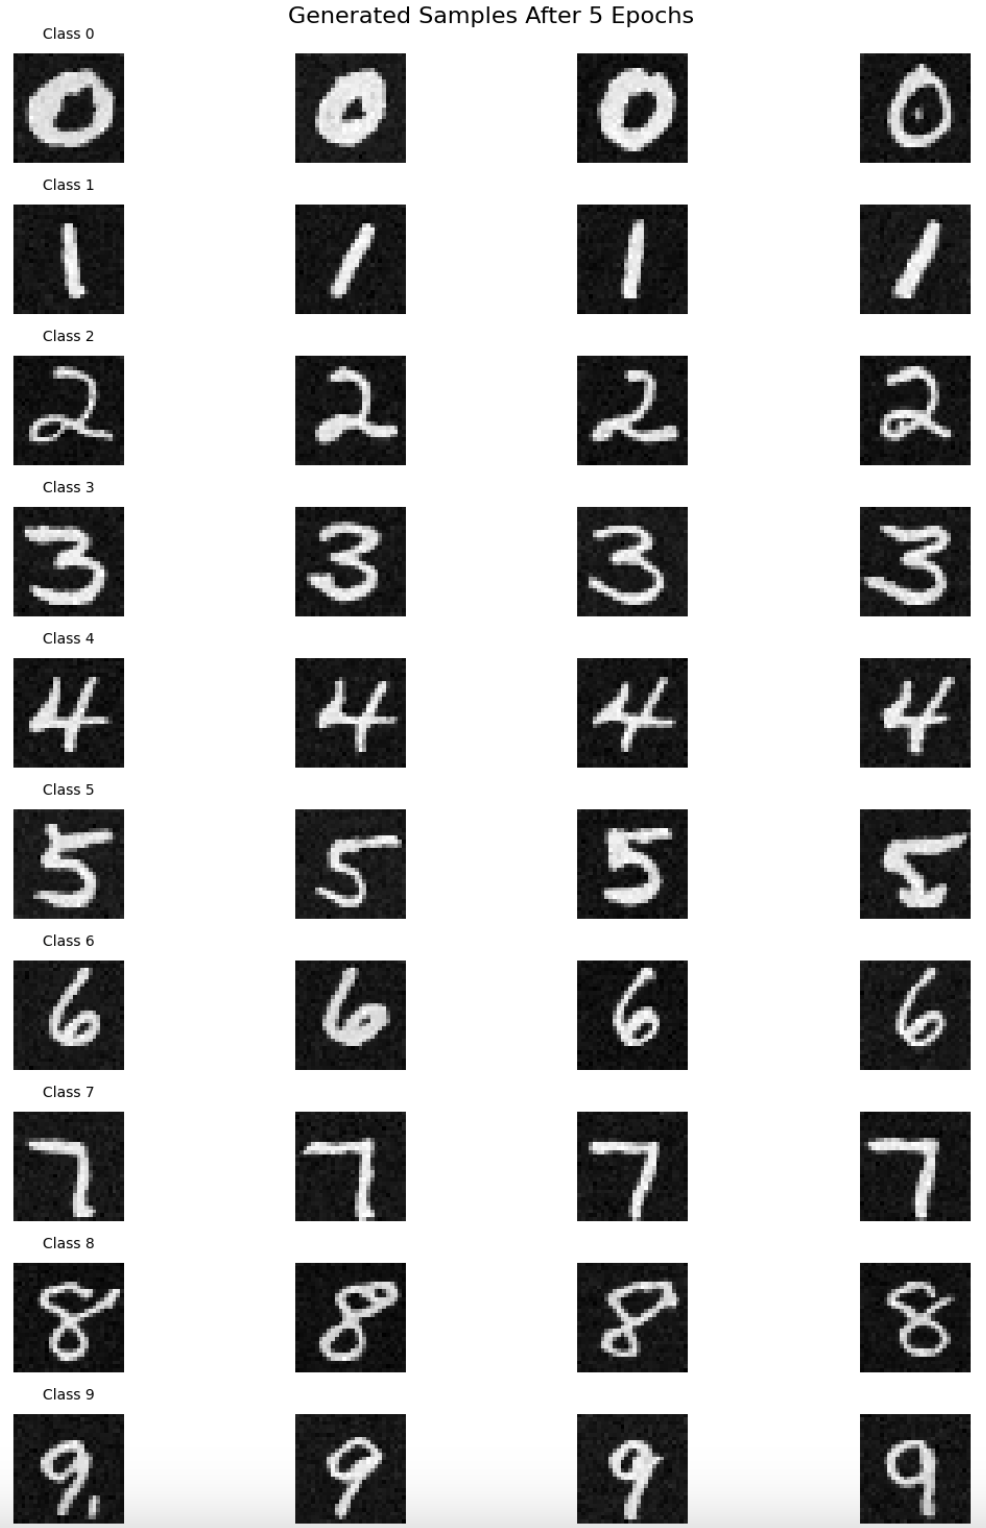
Sampling results for the time-conditioned UNet for 5 epochs.
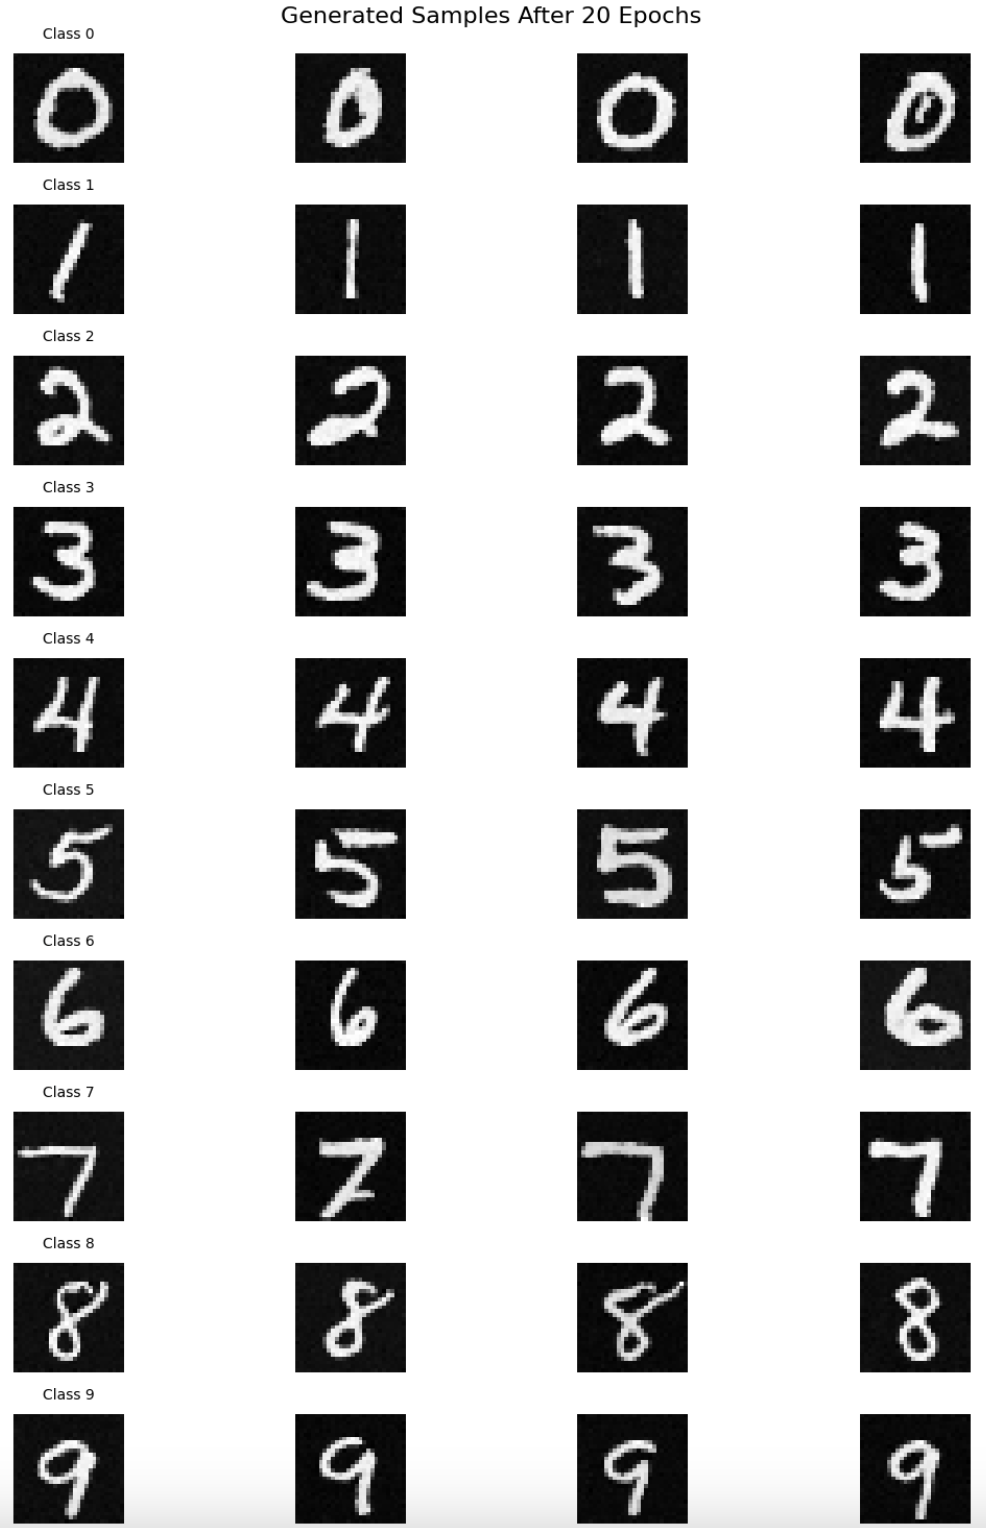
Sampling results for the time-conditioned UNet for 20 epochs.